
My son Nolan came home from a Saturday double-header in May looking like he had just carried furniture up three flights of stairs. He is seventeen, throws about 87 miles per hour off the mound, and had gone five innings in game one before pitching two innings of relief in game two. His forearm was tight from his wrist to his elbow. His shoulder felt, in his words, like someone had inflated a basketball inside it. I had the BOB AND BRAD Q2 on the kitchen counter. And I had no idea where to start.
That was early in my learning curve. In the months since, I have read through several sports medicine studies on percussive therapy and post-exercise muscle recovery, talked with a physical therapist who works with a local college baseball program, and logged what actually worked versus what made things worse. What follows is the protocol I settled on. It is not a substitute for seeing a sports medicine doctor if your pitcher has real pain, and I will say clearly where the line is between normal post-outing soreness and something that needs a physician. But for the typical heavy-armed, under-recovered teen pitcher coming off a full start, this sequence has made a consistent difference for Nolan.
Want the massage gun we use for this entire protocol?
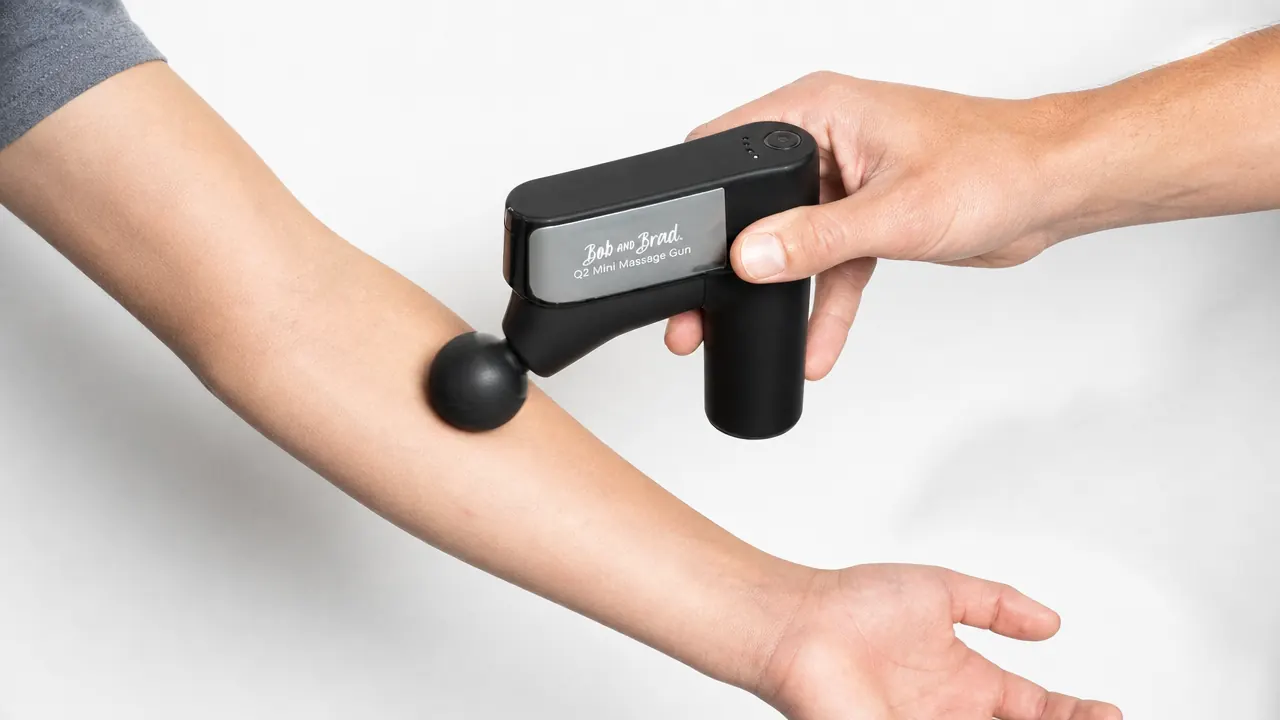
The BOB AND BRAD Q2 Mini is compact enough to fit in a baseball bag, quiet enough for the parking lot after a game, and has the right stall force for forearm and shoulder work on a teen pitcher. 4.7 stars across more than 15,000 reviews.
Amazon Check Today's Price on Amazon →Before You Start: What a Massage Gun Is Actually Doing to the Tissue
Percussion therapy works through two mechanisms that matter specifically for a post-outing pitcher. First, the rapid mechanical stimulation increases local blood flow to the muscle, which accelerates the clearance of metabolic byproducts (including lactate) that accumulate during high-intensity throwing. Second, percussive input appears to modulate the muscle spindle reflex, reducing the tone of muscles that have tightened defensively during high-load activity. For a pitcher, this means the forearm flexors and shoulder posterior chain that have been firing at maximum effort for two hours can be gently persuaded to let go.
This is different from massage for injury treatment. You are not breaking up scar tissue. You are not treating an inflamed tendon. You are doing circulatory maintenance on healthy, fatigued muscle. That distinction matters because the rules are different. On healthy fatigued tissue, moderate pressure and longer duration is productive. On inflamed or acutely painful tissue, the massage gun should not be there at all.
Step 1: Wait 20 Minutes After the Last Pitch
This is the step most parents skip. Right after an outing, the muscles in the pitching arm are still in an acute inflammatory state. Blood is pooling into microtrauma sites in the flexor tendons and rotator cuff. The nervous system is still running elevated sympathetic tone. Running a massage gun over that tissue immediately after the last pitch is not helpful and could be mildly counterproductive by increasing circulation to an area that needs a brief moment of relative rest before active recovery begins.
Use the first twenty minutes post-game for light movement: a slow walk, gentle shoulder circles, shaking out the arm. Nolan usually does a lap of the outfield or helps with equipment break-down. When you get home, or in the parking lot twenty to thirty minutes after the final pitch, is when you start the gun.
Hydration during this window matters too. Fatigued muscle tissue is easier to work through when it is well-hydrated. Have your pitcher drink at least sixteen ounces of water between the last pitch and the first pass with the massage gun.
Step 2: Start with the Forearm Flexors (Inner Forearm)
Set the massage gun to its lowest speed. For the BOB AND BRAD Q2, that is the first of its five settings. Use the round ball head or the flat head, not the bullet attachment. The bullet is for deep targeted work on large muscle bellies and has no place on a teen pitcher's forearm, where the flexor tendons run close to the surface.
Have your pitcher rest his throwing arm palm-up on a flat surface or on your knee. Starting at the meaty part of the inner forearm just below the elbow crease, move the gun slowly toward the wrist and back. Slow means one inch per second. Cover the full length of the inner forearm twice. Then hold the gun stationary on any spot that feels notably harder or more tender than the surrounding tissue, for thirty seconds. Move on when the tightness releases slightly.
Total time on the forearm flexors: sixty to ninety seconds per pass, two passes. Do not exceed two minutes on this zone in a single session.
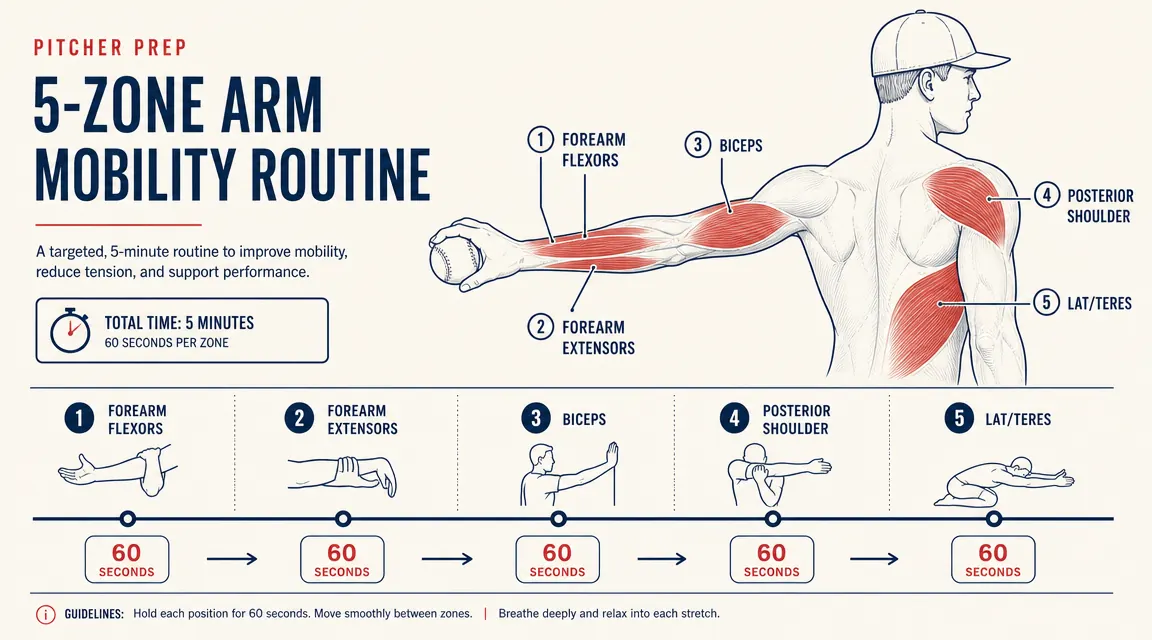
Step 3: Work the Biceps and Brachialis
The biceps takes a significant eccentric load during the deceleration phase of every pitch. After a full start, it is often more fatigued than pitchers or parents realize because it does not generate the obvious soreness that the forearm flexors do. Chronic underwork on the biceps is one reason pitchers develop anterior elbow tightness over the course of a long season.
With the arm resting palm-up, move to the front of the upper arm. Use the same slow sweeping motion, starting at the lower portion of the biceps near the elbow and moving up toward the shoulder. Stay on the muscle belly and away from the tendons at either end. On a teenager, you will often find a tight band about a third of the way up from the elbow. That is common after high-pitch-count outings. Spend an extra thirty seconds there.
Total time on the biceps and brachialis: sixty to ninety seconds. No more than two passes.
Step 4: Address the Posterior Shoulder (Infraspinatus and Teres Minor)
This is the zone that most parents miss and physical therapists consistently flag as under-addressed in youth pitcher recovery. The posterior rotator cuff, specifically the infraspinatus and teres minor, fires during every deceleration after release. Over the course of fifty to eighty pitches, these muscles accumulate significant fatigue and protective tone. Posterior shoulder tightness is one of the early tissue-level changes that precedes more serious UCL loading, because when the posterior capsule tightens, the humeral head shifts slightly forward, which increases valgus stress at the elbow with every subsequent pitch.
Have your pitcher sit upright with his throwing-arm elbow resting on a table or crossing his body slightly to expose the back of the shoulder. Use the flat head attachment. Work the area from the back edge of the shoulder blade toward the outside of the shoulder in slow strokes. The posterior shoulder has more bony landmarks to navigate around than the forearm, so keep your pressure lighter here than on the upper arm. If your pitcher says it hurts sharply rather than in the normal way-tender-muscle-releasing way, stop and assess.
Total time on the posterior shoulder: ninety seconds, two passes. This is the single most valuable zone in the protocol if your pitcher throws more than sixty pitches in a start.
Posterior shoulder tightness is the tissue-level change most parents miss. It is also one of the early warning signs that precedes increased UCL loading. Spend your ninety seconds here before anywhere else.
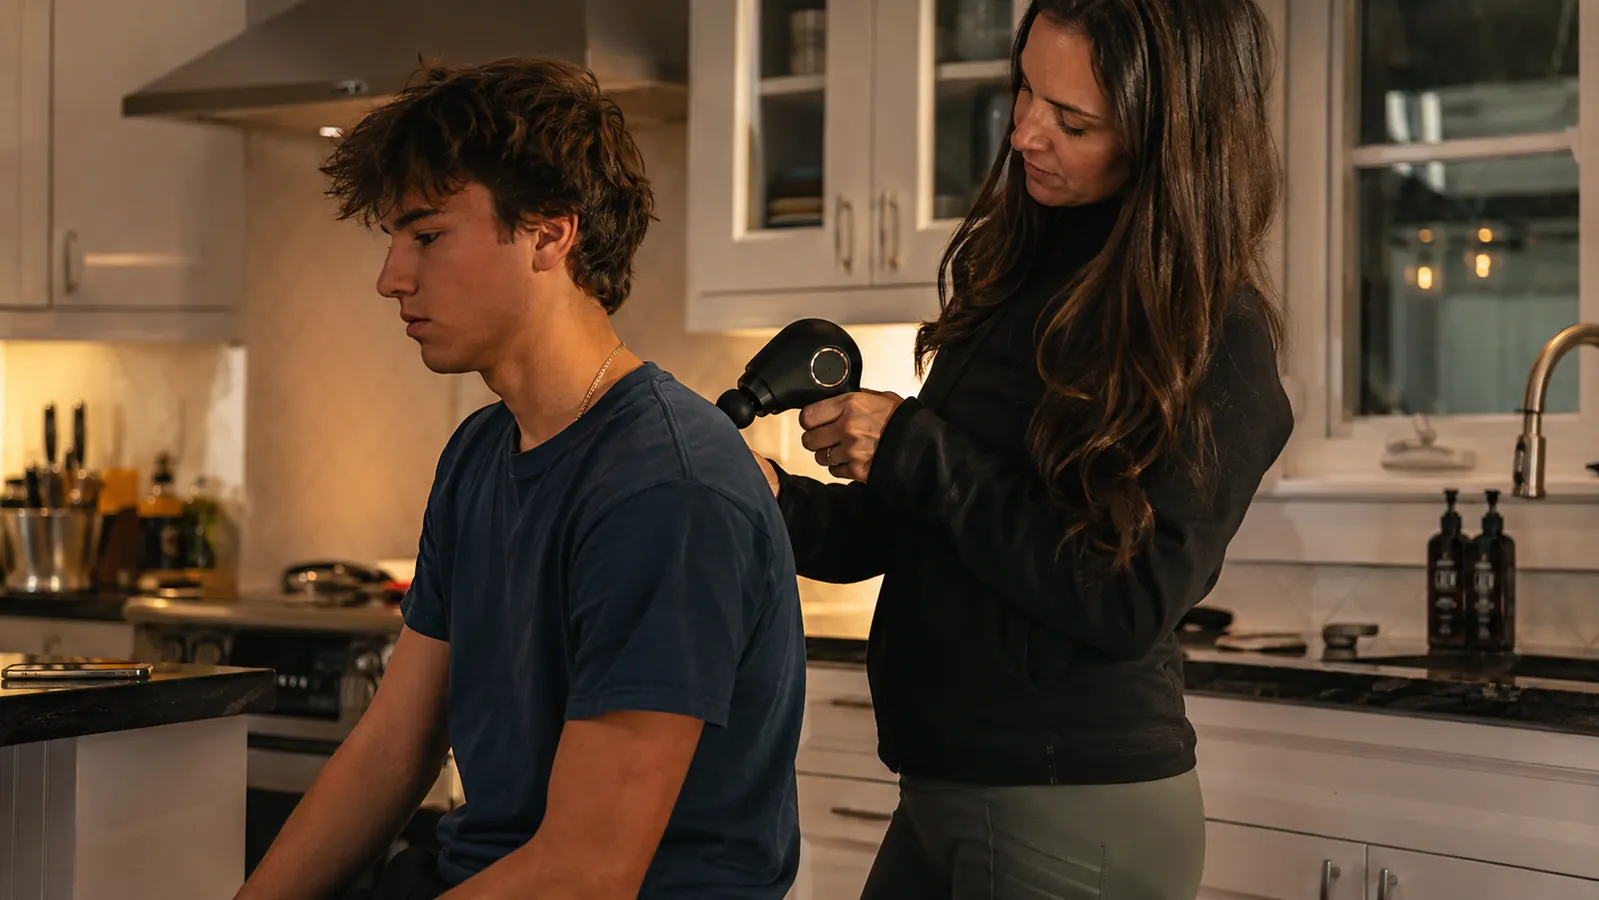
Step 5: Finish with the Lat and Teres Major (Side of the Torso)
The latissimus dorsi and teres major are powerful internal rotators that contribute heavily to the acceleration phase of the pitch. They are large muscles and can handle slightly more pressure than the smaller structures around the shoulder. Use the ball head on a medium speed setting for this zone. Work from just below the armpit down the side of the torso toward the lower rib cage. Have your pitcher hold his arm slightly away from his body to create space.
This zone does not need pinpoint work. Long, broad strokes at a moderate pace for sixty to ninety seconds is enough. Its main purpose in the protocol is to release the tension in the internal rotators so the shoulder can recover into a more neutral resting position overnight.
After you finish all five zones, the total active time with the massage gun should be somewhere between eight and twelve minutes on the pitching arm. That is the right duration for post-outing maintenance work. More is not better. Research on percussive therapy suggests that beyond about fifteen minutes of continuous use on a given muscle group, you start to lose the blood-flow benefit and risk simply irritating the tissue.
What Else Helps: Combining the Massage Gun with Your Full Recovery Stack
The massage gun works best as one part of a coordinated recovery plan, not as a standalone solution. On the nights after a start, Nolan's full protocol is: light movement for twenty minutes post-game, the massage gun sequence above in the parking lot or at home, followed by ice on the posterior shoulder and medial elbow for fifteen minutes with a fitted ice wrap. The PRO ICE Youth Pitcher Wrap handles the icing step well because it covers both the shoulder and elbow simultaneously without him having to hold anything in place. You can read my detailed notes on that tool at the PRO ICE Youth Pitcher Wrap long-term review.
On non-pitching days, the massage gun can be used during arm care warm-up to increase blood flow before J-band exercises or light catch. The sequence is different for pre-activity use: shorter duration per zone (thirty seconds), lighter pressure, and you skip the posterior shoulder entirely before a session because you do not want to reduce posterior capsule tone before the stabilizing muscles need to work. The massage gun for pre-activity warm-up is about perfusion, not recovery.
If your pitcher is on a four-day start rotation during a tournament week, the massage gun should be part of the plan for every one of those four days, not just the day after each start. Days two and three in a tournament week are often when posterior shoulder tightness peaks, because the cumulative load outpaces the recovery window. Staying ahead of that tightness is easier than trying to address it after it has set.
When to Stop and Call the Doctor Instead
As a nurse, I feel obligated to say clearly: a massage gun treats fatigued, healthy tissue. It does not treat injury. There are specific presentations where you should put the gun down and pick up the phone. These include any sharp, stabbing, or electric-sensation pain during or after pitching, any pain localized to the medial elbow that does not resolve within 24 to 48 hours of rest, any sensation of popping or giving-way at the elbow, swelling that is visible or palpable at the medial elbow or any part of the forearm, and any decrease in grip strength compared to the non-throwing hand. Those findings need a sports medicine evaluation, not a massage protocol.
Normal post-outing soreness is diffuse, distributed across the forearm and posterior shoulder, improves with the recovery protocol described above within twenty-four to thirty-six hours, and does not localize to a specific point on the medial elbow or along a tendon line. If your pitcher cannot clearly distinguish which part of his arm hurts, it is probably normal fatigue. If he can point to an exact spot with one finger and it reproduces pain on palpation, that is a different situation.
Why the BOB AND BRAD Q2 Fits This Protocol
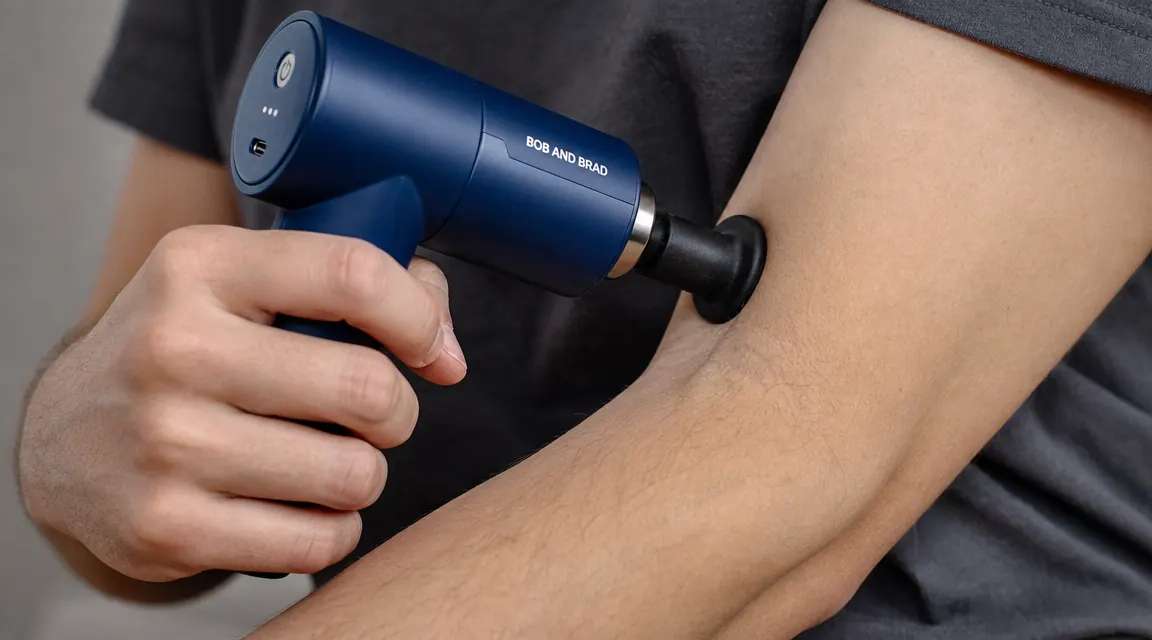
I use the BOB AND BRAD Q2 specifically for this protocol because of its size and stall force profile. The Q2 is a pocket-sized unit that fits in a standard baseball bag side pocket, which means it is actually present at the game rather than sitting forgotten in the car. Most full-size massage guns are too bulky to consistently carry to tournaments. The Q2 weighs about 1.1 pounds and has a stall force around 35 lbs, which is appropriate for the moderate-pressure work this protocol calls for. It will not plow through the tissue the way a Theragun Pro would, which on a teen pitcher's arm is a feature, not a limitation. You can read my in-depth look at the Q2 specifically as a pitcher-arm tool in the BOB AND BRAD Q2 six-month review.
The five speed settings give you enough range to adjust per zone, the battery lasts through a full tournament weekend on one charge, and the noise level is low enough that Nolan can use it in the dugout between games without drawing a crowd. For a tool you are going to use eight to twelve minutes after every start over a full season, those practical details matter as much as the specs.
The Q2 is small enough to live in the gear bag and quiet enough to use in the parking lot.
If your pitcher is coming off a heavy start and you want a recovery tool that is genuinely portable and calibrated for arm work, the BOB AND BRAD Q2 is the one we have used consistently for six months. Current price is on Amazon.
Amazon Check Today's Price on Amazon →